Python-related procedures#
In this section, we will show you a few things related specifically to running code reproducibly with Python and Jupyter notebooks. . For more general debugging tips for Python and other computer languages, see our wiki.
Python package installation#
Most systems will have the standard Python package installer pip already installed, so you should be able to use it.
If pip is not available…
Should for some reason pip not be installed, you can install pip into your user library using the procedures outlined at https://pip.pypa.io/en/stable/installation/#ensurepip. In a nutshell, for Linux
python -m ensurepip --upgrade
should work.
Best practice to reproduce a Python paper (Python environments)#
You should create a Python environment that is dedicated to the project. See Anaconda instructions as one possible method, venv as another one, though others exist.
Native Python venv#
Here’s venv version in a nutshell (full guide). Open up a shell.
Ensure
venvexists:
pip3 install pyenv
Create a new environment
python3 -m venv /path/to/new/virtual/environment
or if using relative paths
python3 -m venv env
which will create /path/to/new/virtual/environment or (relative to your current working directory) env. That directory will now contain all of your project-related Python packages.
To activate:
source env/bin/activate
On Windows Bash (depends on install)
python -m venv env
source env/Scripts/activate
To deactivate:
deactivate
Anaconda method#
On Windows, use Anaconda Powershell Prompt or Anaconda Prompt
On BioHPC
Follow instructions at BioHPC on how to install miniconda in your home directory, then add the line
source $HOME/miniconda3/bin/activate
at an appropriate location in the code (for instance, replacing module load conda in the SLURM batch file), or interactively.
In the shell of your choice, run
conda create -n (your_env_name)
where ideally, (your_env_name) is the name of the JIRA issue, in lower case (e.g., aearep-123).
Then, activate the environment:
conda activate (your_env_name)
To deactivate, run
conda deactivate
Making Python code dynamic#
In general, Python code should not have hard-coded paths. Python programs are aware of their own location, and other directories should be relative to that. However, some authors may still follow (econ-specific) norms, and hard-code paths. Similar to our approach for Stata, R, and MATLAB, you can use the rootdir principle to make the code more portable/dynamic.
In that case, do the following:
Say the author has code like
xlsread('C:\Users\me\submission\AEJMacro\yesterday\data.xlsx')
At the top of the program, add the following lines:
import os
rootdir = os.path.realpath(__file__)
Then, wherever the hard-coded path appears, replace it with:
xlsread(os.path.join(rootdir,'data.xlsx'))
Alternatively, if the author uses a change of working directory, then
import os
os.chdir(os.path.dirname(os.path.abspath(__file__)))
would change the working directory to the location of the file being run.
Installing packages#
Sometimes, authors will list the packages they used. There are a few options:
If the authors provide a requirements.txt file, you can install all the packages at once. From an appropriate terminal, run:
pip install -r requirements.txt
If the authors provide an environment.yml file, they used Conda as the Python system manager. From an appropriate terminal, run:
conda env create -f environment.yml
If the authors provide a list of packages, the easiest way is to create a simple requirements.txt file with a text editor (e.g., VS Code), then proceed as with the first option.
Using Anaconda Package manager#
This is known to work on CISER (CCSS-Classic).
This may not be the way it works on CCSS-Cloud.
Needs an update
If using the default “Jupyter” link in the Start Menu, the working directory won’t be right. Assuming that you have set your Workspace to L:\Documents\Workspace, the following will create a Jupyter Notebook in the right location (thanks to Louis Liu for creating this Howto)
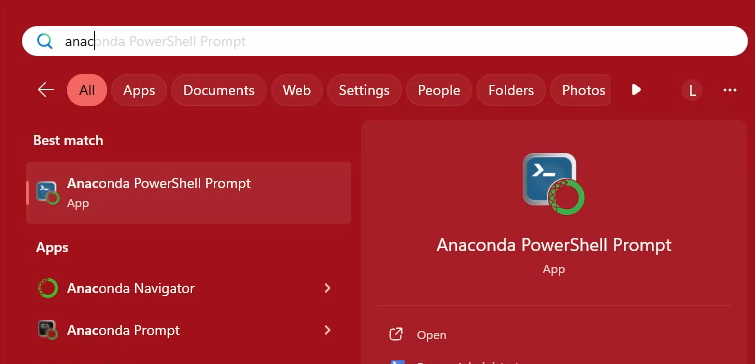
Search “anaconda prompt” from the start menu. right click on the app when it appears and pin it to the taskbar.#

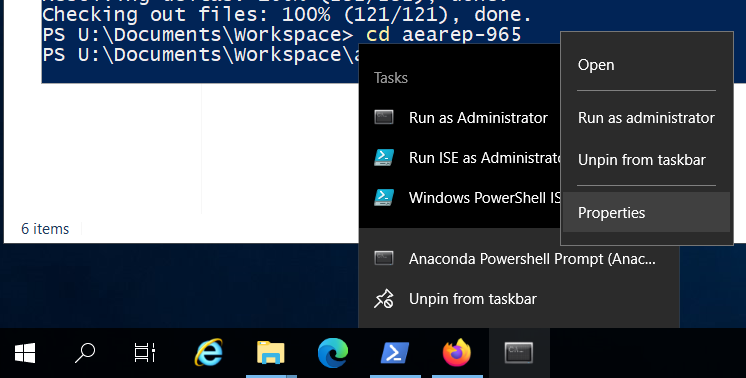
Right click on anaconda prompt in the taskbar (looks like a black window, similar to command line or terminal). Right click on “anaconda powershell prompt” in the tasks menu that pops up, and then properties.#
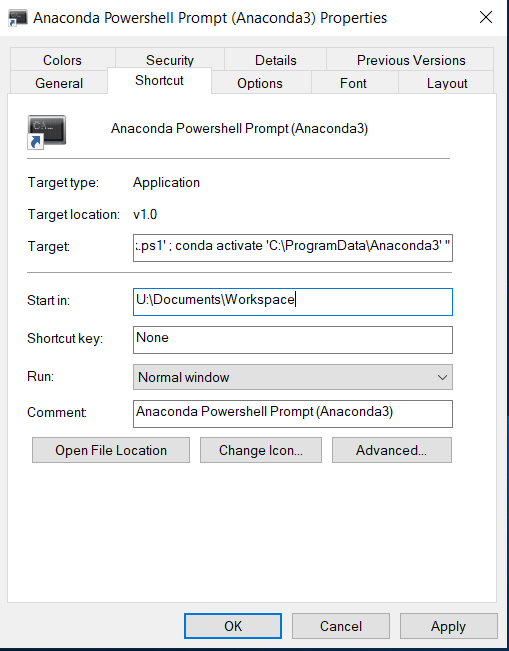
In the properties window, go to the shortcut tab and change the “Start in:” field to U:\Documents\Workspace or whichever directory you keep your bitbucket repos in. Click apply.#
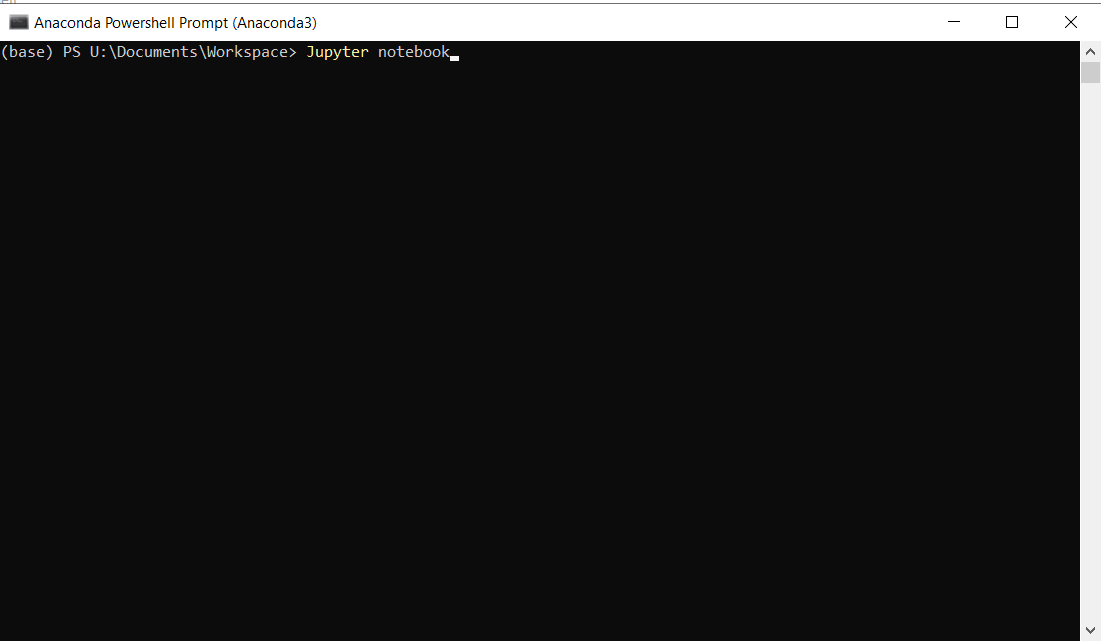
Next, click on the anaconda prompt shortcut in the taskbar. When anaconda prompt opens, enter the command “Jupyter notebook”#
Running Jupyter Notebooks#
Interactively#
In order to run Jupyter notebooks that you started from the Conda prompt, do the following, once you have opened the Jupyter Notebook or Jupyter Lab interface:
Navigate to the directory where the notebook is located
Open the notebook
Clear all the cells:
Cell->All Output->ClearRun all the cells:
Cell->Run AllSave the notebook:
File->Save and Checkpoint
If you are using VS Code, open the notebook in VS Code. You should get options to choose a kernel. If prompted to create an environment, do so.

Then, from the top-menu,
Choose “Clear All Outputs”
Choose “Run All”
Save the notebook
From the
...menu, choose “Export” -> “PDF”
From the command line#
You should also be able to do the following from the command line:
If you have a LaTeX installation, you can convert the notebook to a PDF using the following commands:
# requires a latex installation
pip install nbconvert ipykernel
Define the notebook name:
NOTEBOOK=/path/to/notebook.ipynb
jupyter nbconvert --ClearOutputPreprocessor.enabled=True --to notebook  \
  --inplace --execute "$NOTEBOOK"
jupyter nbconvert --to pdf   "$NOTEBOOK"
Alternatively, you can convert the notebook to a PDF more closely resembling the HTML view as follows. First, install additional packages:
pip install nbconvert[webpdf] ipykernel
pip install pyppeteer
Then run this code:
jupyter nbconvert --ClearOutputPreprocessor.enabled=True \
  --allow-errors \
  --inplace  --to notebook --execute "$NOTEBOOK" || echo "Errors occurred while executing"
jupyter nbconvert --to webpdf --allow-chromium-download "$NOTEBOOK"
Not sure yet. Needs augmentation.
Document the packages YOU used#
If you had to iteratively install packages, you should run the following command at the end of your whole process:
pip freeze > requirements.txt
and add that output (the contents of the requirements.txt file) to the repository, and to an appendix in the report. Take care to not overwrite author-provided requirements.txt files.