Writing Report#
At this stage, you will write the final version of the report.
Signalling where you are#
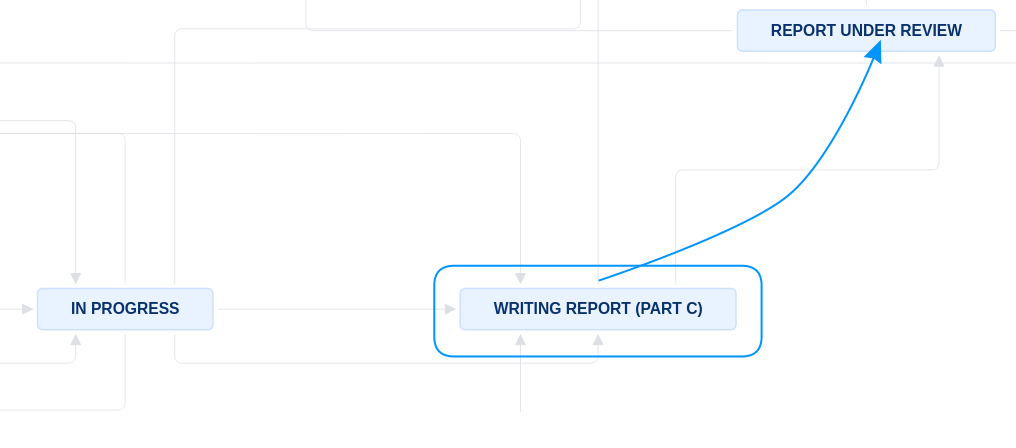
Move the Jira issue to “Writing report”.
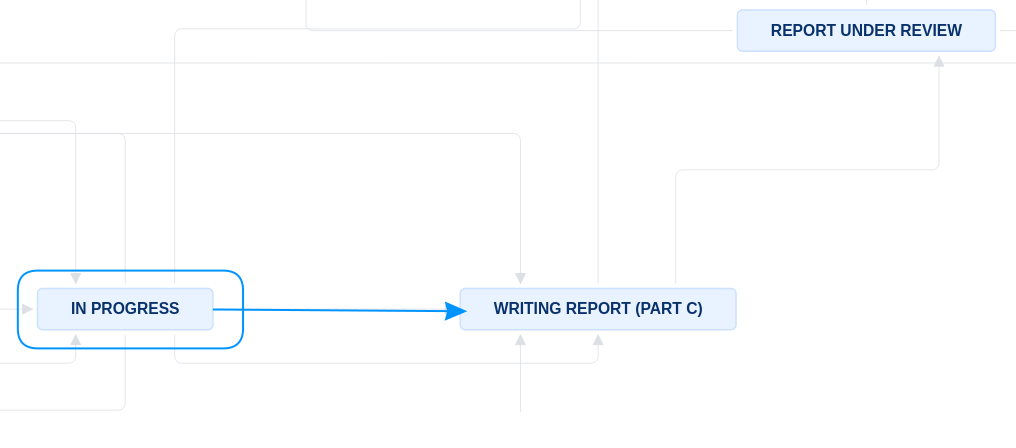
In order to do so:
Check that both sub-tasks (part A and part B) are marked as “
Done”.If there is a sub-task about restricted data, it must either indicate that data were received, or that data were deleted. However, do NOT delete restricted data yourself.
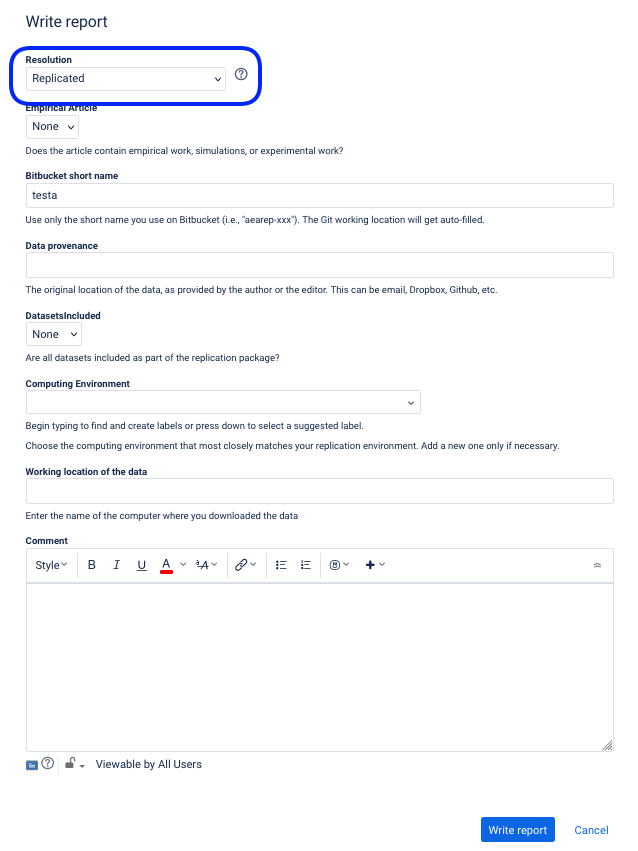
You should now be able to select “Write report” from the dropdown menu. A pop-up will appear, asking you to fill out the fields and confirm the transition.
Important!
You should choose here the “Resolution” that corresponds to the outcome of the replication. This is preliminary - you will be able to adjust it after completing Part C, but based on what you observed in Part B, you may already have a good idea of the outcome. If uncertain at this point, choose x-------x.
Run the Merge Pipeline#
At this point, there will be two parts of the report: REPLICATION-PartA.md and REPLICATION-PartB.md. To facilitate further editing, we will merge these two parts into a single file, REPLICATION.md. This can be done manually, or using the pipeline.
Run the pipeline to merge the two parts.
Important!
Be sure to have committed and pushed all changes to the repository before running the pipeline.
Finding the Pipeline menu
First, in the Bitbucket repository for your issue (you can find the link under
Repl.info->Git working location) , navigate to thePipelinestab
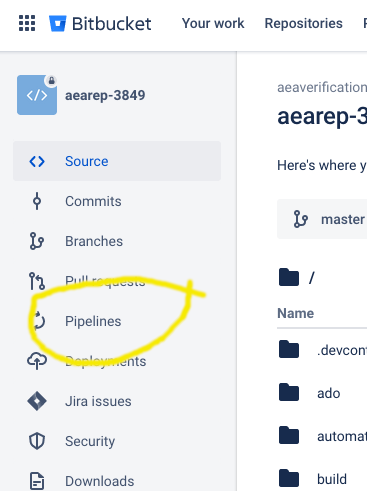
You will now need to select a “pipeline” to run.
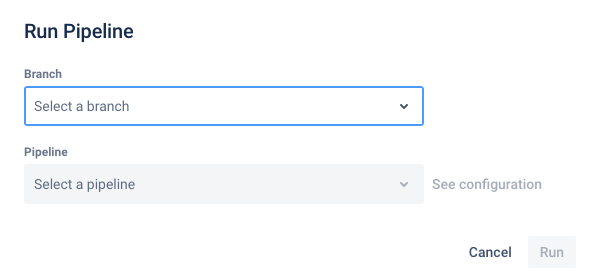
Choose “
2-merge-report” (might change in the future), and hitRun.
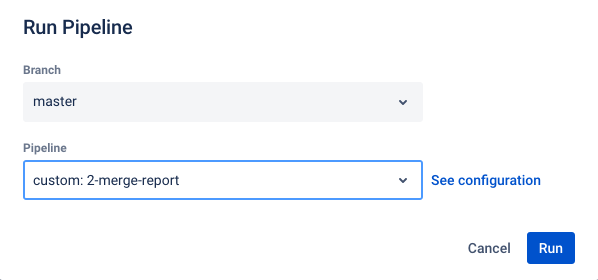
Your pipeline will start. It will be very quick, and update the repository with the merged file.
Back on your computer, pull the changes from the repository. You should now see a new file,
REPLICATION.md.
git pull
If you want to do this on your own computer, you can use one of two methods:
Using the command line:
cat REPLICATION-PartA.md REPLICATION-PartB.md > REPLICATION.md
Manually, using a text editor:
Open the two files
REPLICATION-PartA.mdandREPLICATION-PartB.mdin a text editorCopy the contents of
REPLICATION-PartB.mdand paste them at the end ofREPLICATION-PartA.mdSave the file as
REPLICATION.md
In both cases, you now need to remove the parts, and add the combined file:
git rm REPLICATION-PartA.md REPLICATION-PartB.md
git add REPLICATION.md
git commit -m "Merged parts A and B"
git push
Warning
From here on, be sure to use the consolidated REPLICATION.md!
Standard steps#
Compare images and tables
Some of this may involve “squinting” at images…
For tables that are output to Excel, you may be able to use some Excel tools (copy the old numbers, create a difference function between all cells). This is hard to provide examples for, as every table differs.
For tables that are output as LaTeX (files ending with
tex) or as CSV files, and if the authors provided previous versions, you may be able to use Bitbucket to compare them globally, without looking at individual numbers (see Comparing TeX files on Bitbucket).
Warning
We want to learn about ALL differences that you see, even if minor.
When there are differences: Include images of figures and screenshots of tables (both paper and as-reproduced) in the report
For paper images, use a screenshot tool to grab them from the
PDF_Proof.PDFand save them as PNG.For reproduced images, reference the location within the replication directory.
Using an annotation tool on your computer, circle or highlight where you see differences.
Tip
See detailed step-by-step guidance in the Appendix.
Example:
Figure 5 in the paper:

Figure 5 as reproduced:

Highlight differences:
if only a small number of table entries: mention them by table in the report
if a larger number: Highlight on the reproduced images (of figures, screenshots of tables) the differences you have observed
If there are too many differences, let us know immediately, we may then simply send back to the authors with the raw output, and let them address it.
There is sample language for commonly encountered problems at the sample-language-report.md link in the tall grey bar
Advanced: Comparing TeX files on Bitbucket
If the authors provided LaTeX files as part of the replication package, you may be able to leverage Bitbucket or Git to compare them.
Note first that the typical table when output, if identical, will not register as “modified” with Git.
Check the date stamps - if the date is the date you ran the code, then the files were, in fact, replaced, but are not any different.
Alternatively, before you run the code, but after you have written the preliminary report, delete all the TeX files (do not git commit!), then run the code.
If the files are reproduced, but git shows no difference, they are identical.
If for some reason there is a change in platform, git might see a difference, but it is solely the “whitespace” encoding, which differs between Mac, Linux, and Windows. In that case, proceed as follows.
git add *texthengit commitandpushas usual.Navigate to the Bitbucket repository, and select the tab “
Commits”. Click on the commit you just made.You should see a list of files. Click on the first of the
texfiles you want to inspect.You might see the following information:

Click on the “
give it another chance”. You will now see (or were already seeing) a “git diff”, identifying first the old lines (in red), then the new lines (in green). This list can be long.

Navigate to the right of the screen. Choose from the dotted menu the item “Ignore whitespace” (you only need to select the “whitespace” option for the first file).
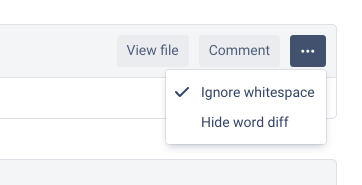
The page will recalculate the “diffs”. If you see the “
give it another chance”, click it again. YOu should now, if the files are truly the same, see the following:

Do this for all
texfiles (you only need to select the “whitespace” option for the first file). If you scroll up to the summary again, you should see a count next to the file. This shows the number of lines changed, taking into account the “whitespace” option.

Cleaning up#
Clean up the
REPLICATION.md- it should be factual, objective, and not written in the first person.Copy-and-paste from the
code-check.xlsx, including the column “Reproduced?” and any notes column, into the “Findings” part. Use the Excel-to-Markdown plugin for VSCode.Delete all of the instructional lines in
REPLICATION.mdbefore finishing the report.
Commit this part of the report to the Bitbucket repository.
git add REPLICATION.md code-check.xlsx
git commit -m "Completed writing report"
git push
On Jira#
Check that the
DataCitationSummaryfield is filled out indicating how many data citations are in order: all, some, or none.Check that the
Report Locationis filled out.If it is, do not change it.
If for some reason, it is missing (very rare!), enter the full URL from the repository, e.g.
https://bitbucket.org/aeaverification/aearep-123/src/master/REPLICATION.md
You can now submit your report for review by changing the status to Under Review
