Creating a repository and running pipeline#
Warning
In some instances, somebody else has already created a repository. Always check first if the Bitbucket short name is already filled out. If it is, do not run the pipeline scripts again. This can overwrite or destroy changes already made by someone working on the case.
If the Bitbucket short name is filled out, skip this section and go to Collecting information!
What this looks like in Jira
If the scripts have executed, then the Jira ticket will have one or more of these entries:
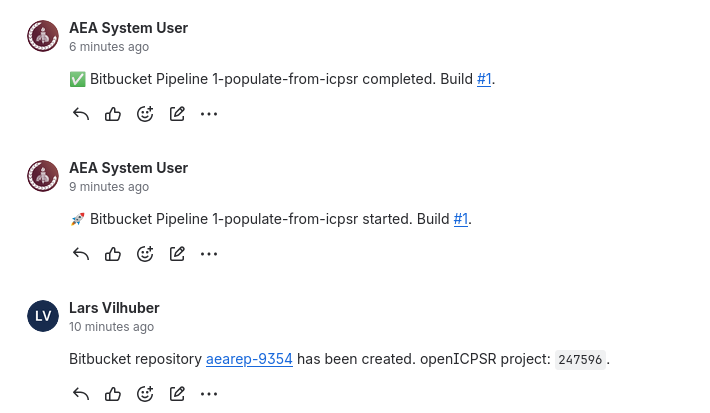
Advanced users
You can also use the editor-scripts toolbox to do this from the command line, see aeagit-create.
Creating a repository#
start by creating a repository using the import method
copy-paste from this URL to the URL field (this is also available in the Jira dropdown “Shortcuts”)
https://github.com/AEADataEditor/replication-template
the repository name should be the name of the JIRA issue, in lower case (e.g.,
aearep-123)Be sure that
aeaverificationis always the “owner” of the report on Bitbucket.The Project should be the
DEFAULTproject, unless you are explicitly asked to create it in a different one (currently only “JEP” and “JEL”)Keep the other settings (in particular, keep this a private repository).
Click
Import RepositoryKeep this tab open!
![]()
We have now created a Bitbucket repo named something like
aearep-123that has been populated with the latest version of the LDI replication template documents!
Ingesting author materials#
We will now ingest the authors’ materials, and run a few statistics. Typically, the materials will be on a (private) openICPSR repository. Sometimes, the materials will be at Dataverse, Zenodo, or elsewhere.
If at openICPSR, the fields
Replication package URL,openICPSR alternate URL, andopenICPSR Project Numberwill be filled.If at Zenodo or Dataverse, the
Replication package URLwill have the DOI of the replication package,openICPSR alternate URLandopenICPSR Project Numberwill be empty.
Note
⚠️ This currently works reliably only for openICPSR. This documentation will be updated when it works for Dataverse and Zenodo as well. In the meantime, follow Manual Steps taking into account repository-specific guidelines.
Inspect the deposit#
First, click on the openICPSR alternate URL URL (or Replication package URL if it contains a DOI and the other fields are empty). Inspect the deposit. The information may be in different locations at other repositories.
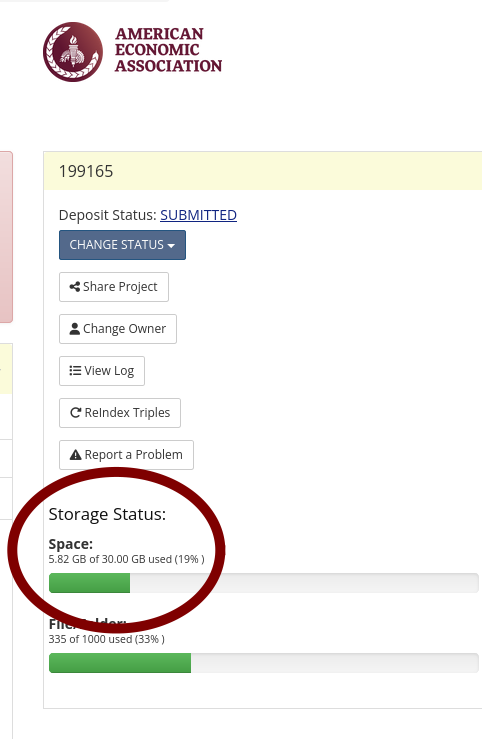
You will see the size of the deposit on the right:
You will see the size of the deposit on the left, below the “featured” file:
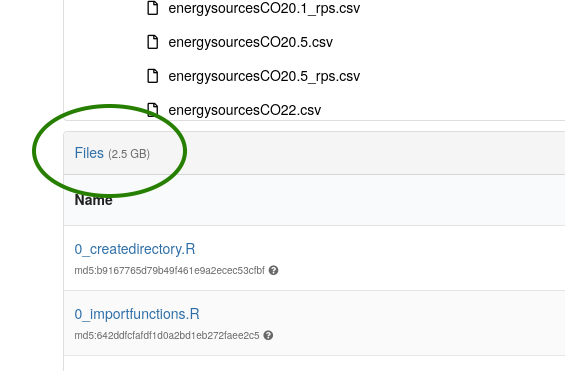
Note
Make a note of the size of the deposit! Bitbucket pipelines have a limit of 1GB for technical reasons, but the size you see is not the size of the ZIPed download, it is the size before compression. The Zipped size is hard to predict.
Running the pipeline#
You will now run what is called a Bitbucket Pipeline. Similar tools on other sites might be called Continuous integration, Github Actions, etc. If you have encountered these before, this will not be news for you, but it isn’t hard even when this new.
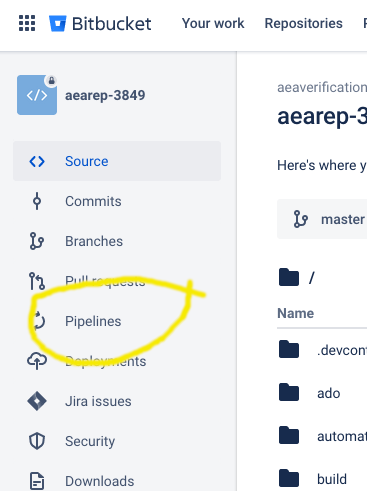
First, in the repository you just created, navigate to the
Pipelinestab
Verify that somebody else is not already running a pipeline!
If yes …
Skip this step, or wait until the pipeline has completed. Do not re-run the same pipeline twice as it can cause problems. Contact the person (via the Jira comments) who is running the pipeline.
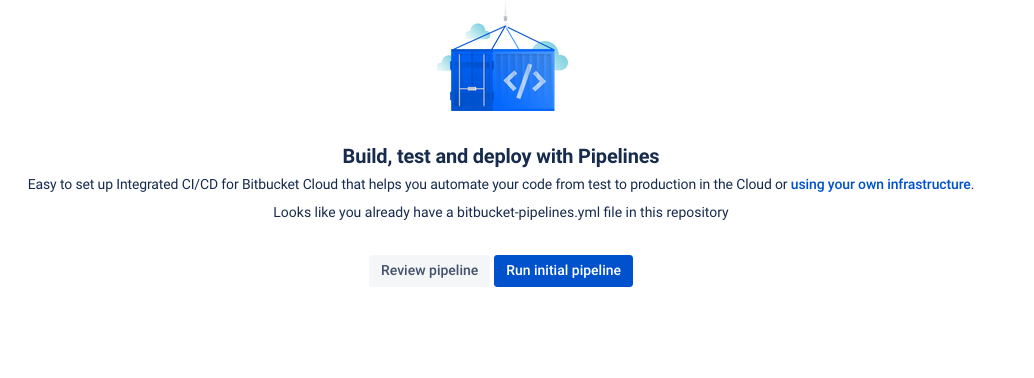
Because this is new, you will see the “Run initial pipeline” page. Click on
Run initial pipeline.
You will now need to select a “pipeline” to run.
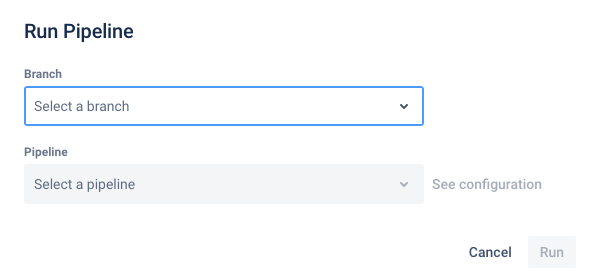
Note
This is where the information about the size of the deposit matters! Choose the option that best matches the size of the deposit.
If the deposit is less than 3 GB…
Choose “
1-populate from ICPSR” (might change in the future), and fill in the ID for the relevant source of the replication package (here: openICPSR ID =123456), and hitRun.
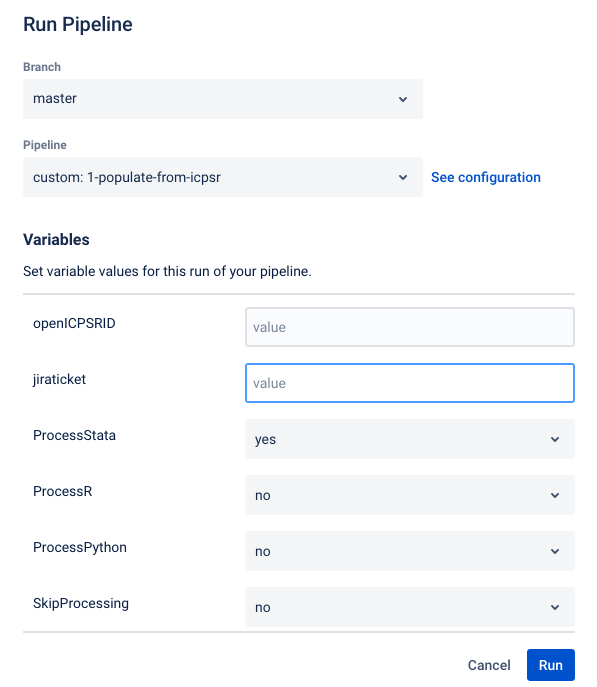
However, closely monitor the pipeline output - it might still fail because the resulting ZIP file is too big. See ZIP file is too big below for how to diagnose this.
If the deposit is more than 3 GB…
Choose “
w-big populate from ICPSR” (might change in the future), and fill in the ID for the relevant source of the replication package (here: openICPSR ID =123456), and hitRun.
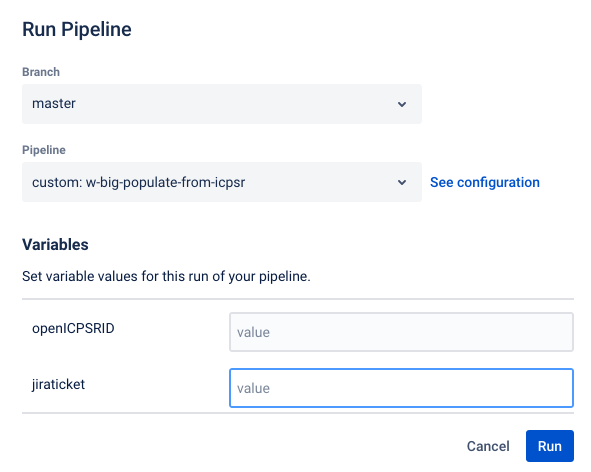
Note that if you choose this pipeline, certain information is not generated (Stata scan, R package scan), and you may need to augment these manually. Try to avoid this pipeline if possible, and make a note in the Jira comments if you had to run this.
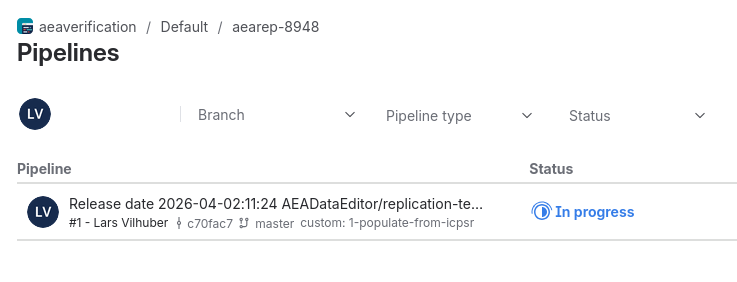
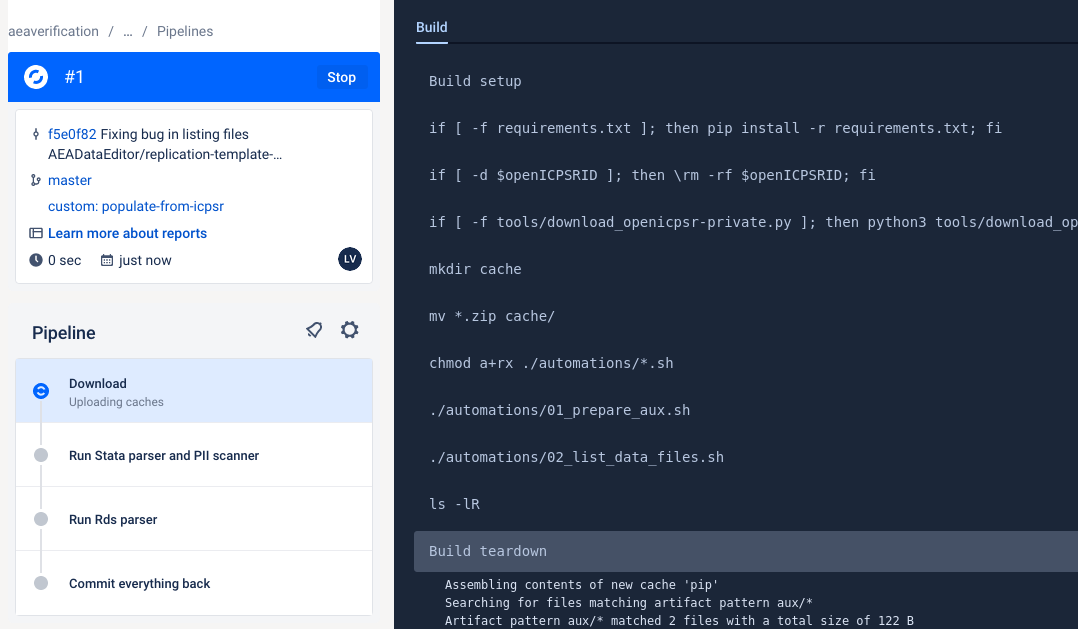
Monitoring the pipeline#
Your pipeline will start, working through various steps. This might take a while! Do the next step (Collecting Information) then come back here.
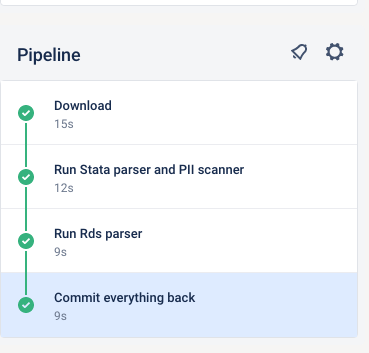
Once your pipeline is done, check that it is green.
If for some reason, it fails, the logs are available for your supervisor to inspect, and to help you. Check out the possible fixes below. You, or the person assigned to
Part B, may then need to do the manual steps later.
Possible errors for pipeline failure#
Files too big#
Bitbucket might complain in the Commit everything back step that
remote: Your push has been blocked because it includes at least one file that is 100 MB or larger.
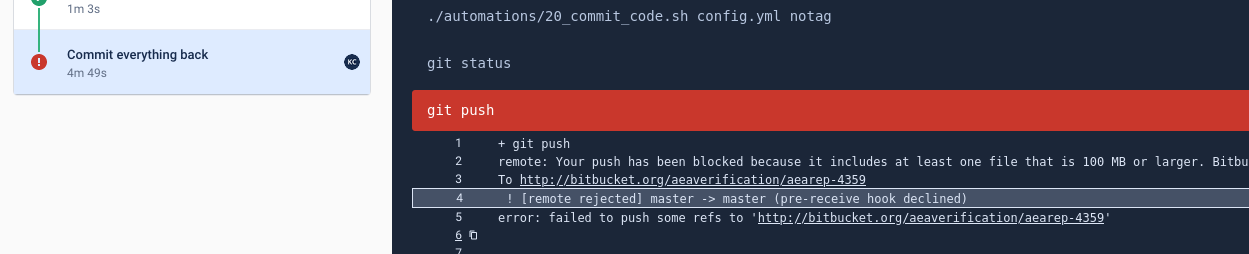
Solution
Investigate which files are being captured that are too big.
You can see the list of large files in the Bitbucket pipeline logs. Find the line in the logs that reads ./automations/01_check_file_sizes.sh $projectID and click on it to expand:
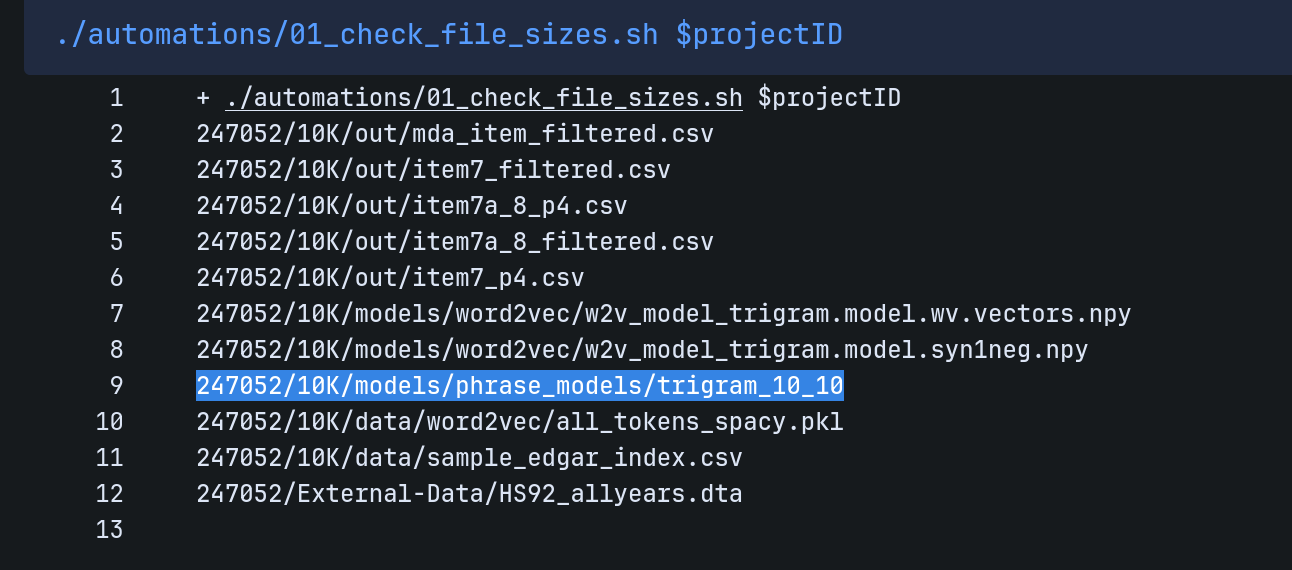
The list of file endings that Git should ignore is kept in the .gitignore file. You can search through that file for any extensions listed in the above listing. Some files do not have extensions, though.
Once you have figured out which files are causing the problem, you should exclude them.
For instance, if it is a previously unlisted extension, list
*.extensionin the.gitignorefile.If it is an extension-less file, list the entire file (in the example above, you might list
trigram_10_10).If it is a file with an extension you do want to generically keep (e.g.,
*.pdf), then listing the entire path to the file should also work (e.g., if there were a huge PDF, you could list247052/10K/data/sample_edgar_index.pdf)
You should make those changes
in your repository, by adding them into the repository-specific
.gitignorein the template
.gitignorefile, by suggesting an edit. Click on this link, then choose “Edit”, and add the extension to the file (you will need a Github account to create a pull request).
Memory or CPU usage to high#
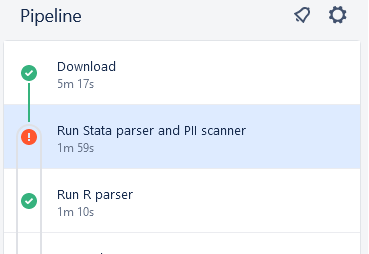
If your pipeline fails in the Stata step, click on the failed step, and scroll to the error message. If you see this:
./automations/10_run_stata_scanner.sh: line 64: 122 Killed stata-mp -b do ../PII_stata_scan.do
It is likely that the PII scan failed because the in-memory dataset is too large (too much memory was run, and the pipeline was killed). Try running the pipeline again with the “w-big populate from ICPSR” (see above).
Cannot stat zip#
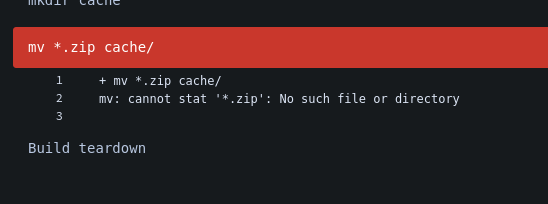
This is an indication of an earlier error, typically forgotten variables. To check, click on the Build setup, and check the Pipeline variables. If it looks like this:
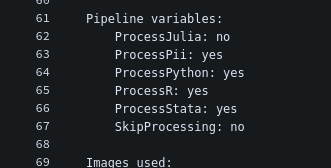
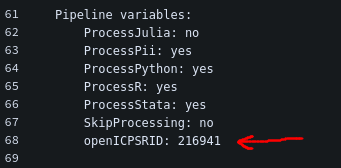
then you forgot to specify the openICPSRID variable. Rerun the pipeline with the correct variable entered. It should look like this:
ZIP file is too big#
When the ZIP file downloaded from the repository is too big, parts of the pipeline will run, but ultimately, the full pipeline may fail.
To diagnose this part,
Go back to the list of Pipeline runs
Click on the failed run
Click on the
Downloadpart.At the very bottom of the log, you will see
Build teardown. Click on it to expand. You are looking for lines mentioningcache/**:A successful run will look something like this:
Searching for files matching artifact pattern cache/**
Artifact pattern cache/** matched 1 files with a total size of 26.1 MiB
Compressed files for artifact "cache/**" matching pattern cache/** to 25.8 MiB in 1 seconds
Uploading artifact of 25.8 MiB
Successfully uploaded artifact in 1 seconds.
A failed run due to the size of the ZIP file will look like this:
Searching for files matching artifact pattern cache/**
Artifact pattern cache/** matched 1 files with a total size of 1 GiB
Compressed files for artifact "cache/**" matching pattern cache/** to 1 GiB in 47 seconds
Compressed artifact size is 39.6 MiB over the 1 GiB upload limit, so the artifact will not be uploaded.
If this is the case, try again with the “w-big populate from ICPSR” pipeline, which will not try to upload the ZIP file, but will still run the other steps.
Download failed#
Since Dec 2025, we have seen occasional failures, with our script being blocked by ICPSR. If you see an error like this:
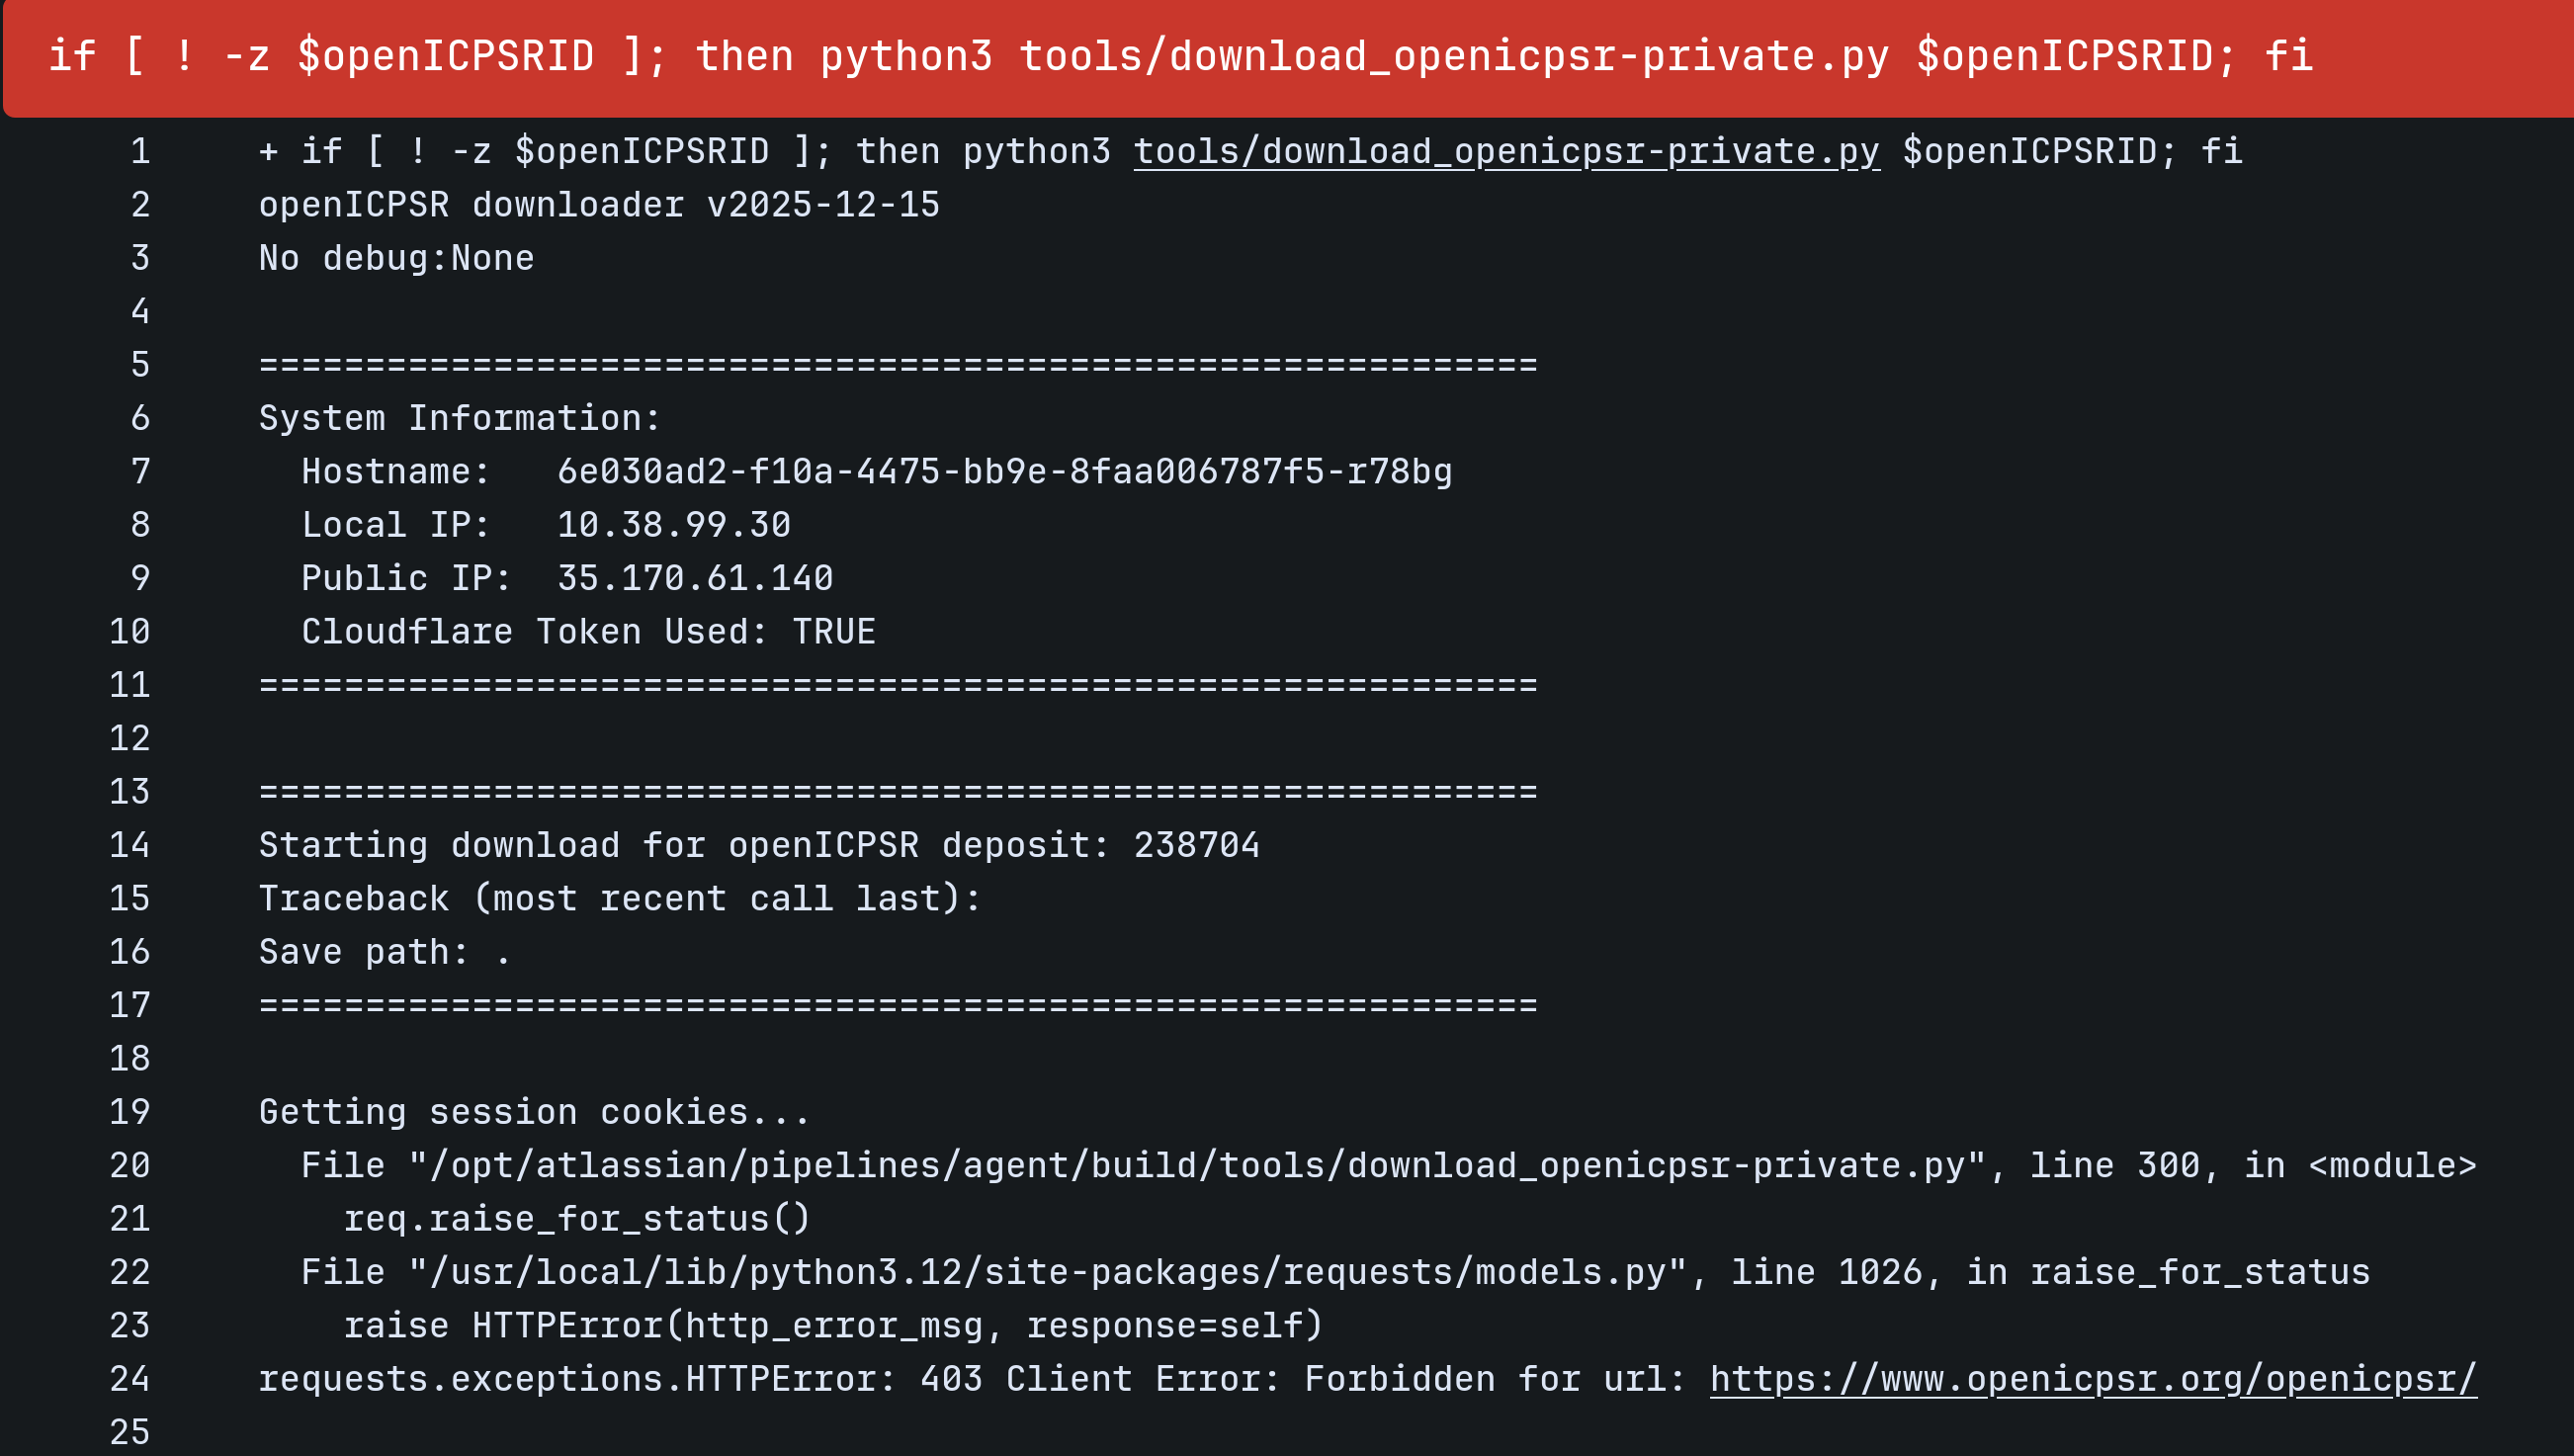
then the download got blocked. There is no need to report it, and usually, it will work after 2-3 retries. Simply run a new pipeline with the same settings (do not use the Rerun button).
Next step#
Once everything has completed to your satisfaction,
fill out the
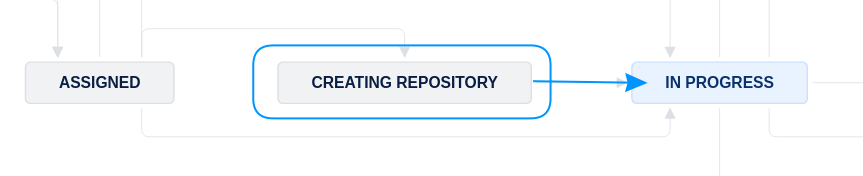
Bitbucket short namefield (e.g.,aearep-1234)Move the Jira issue forward to
In Progress.