Remotes in Bitbucket/GitHub
Overview
Teaching: min
Exercises: minQuestions
How do I share my changes with others on the web?
Objectives
Explain what remote repositories are and why they are useful.
Push to or pull from a remote repository.
Version control really comes into its own when we begin to collaborate with other people. We already have most of the machinery we need to do this; the only thing missing is to copy changes from one repository to another.
Systems like Git allow us to move work between any two repositories. In practice, though, it’s easiest to use one copy as a central hub, and to keep it on the web rather than on someone’s laptop. Most programmers use hosting services like GitHub, Bitbucket or GitLab to hold those master copies; we’ll explore the pros and cons of this in the final section of this lesson.
In other instances, you would start by sharing the changes to the current project. In our lab, we have a template directory structure to maintain the consistency. We import this template folder structure to create a remote repository first, and then clone that remote repository to the local directory and edit there. You can find instructions on creating a remote repository on bitbucket here.
The purpose of the following materials is to help you understand what are the remote and local repositories and how they can interact with each other.
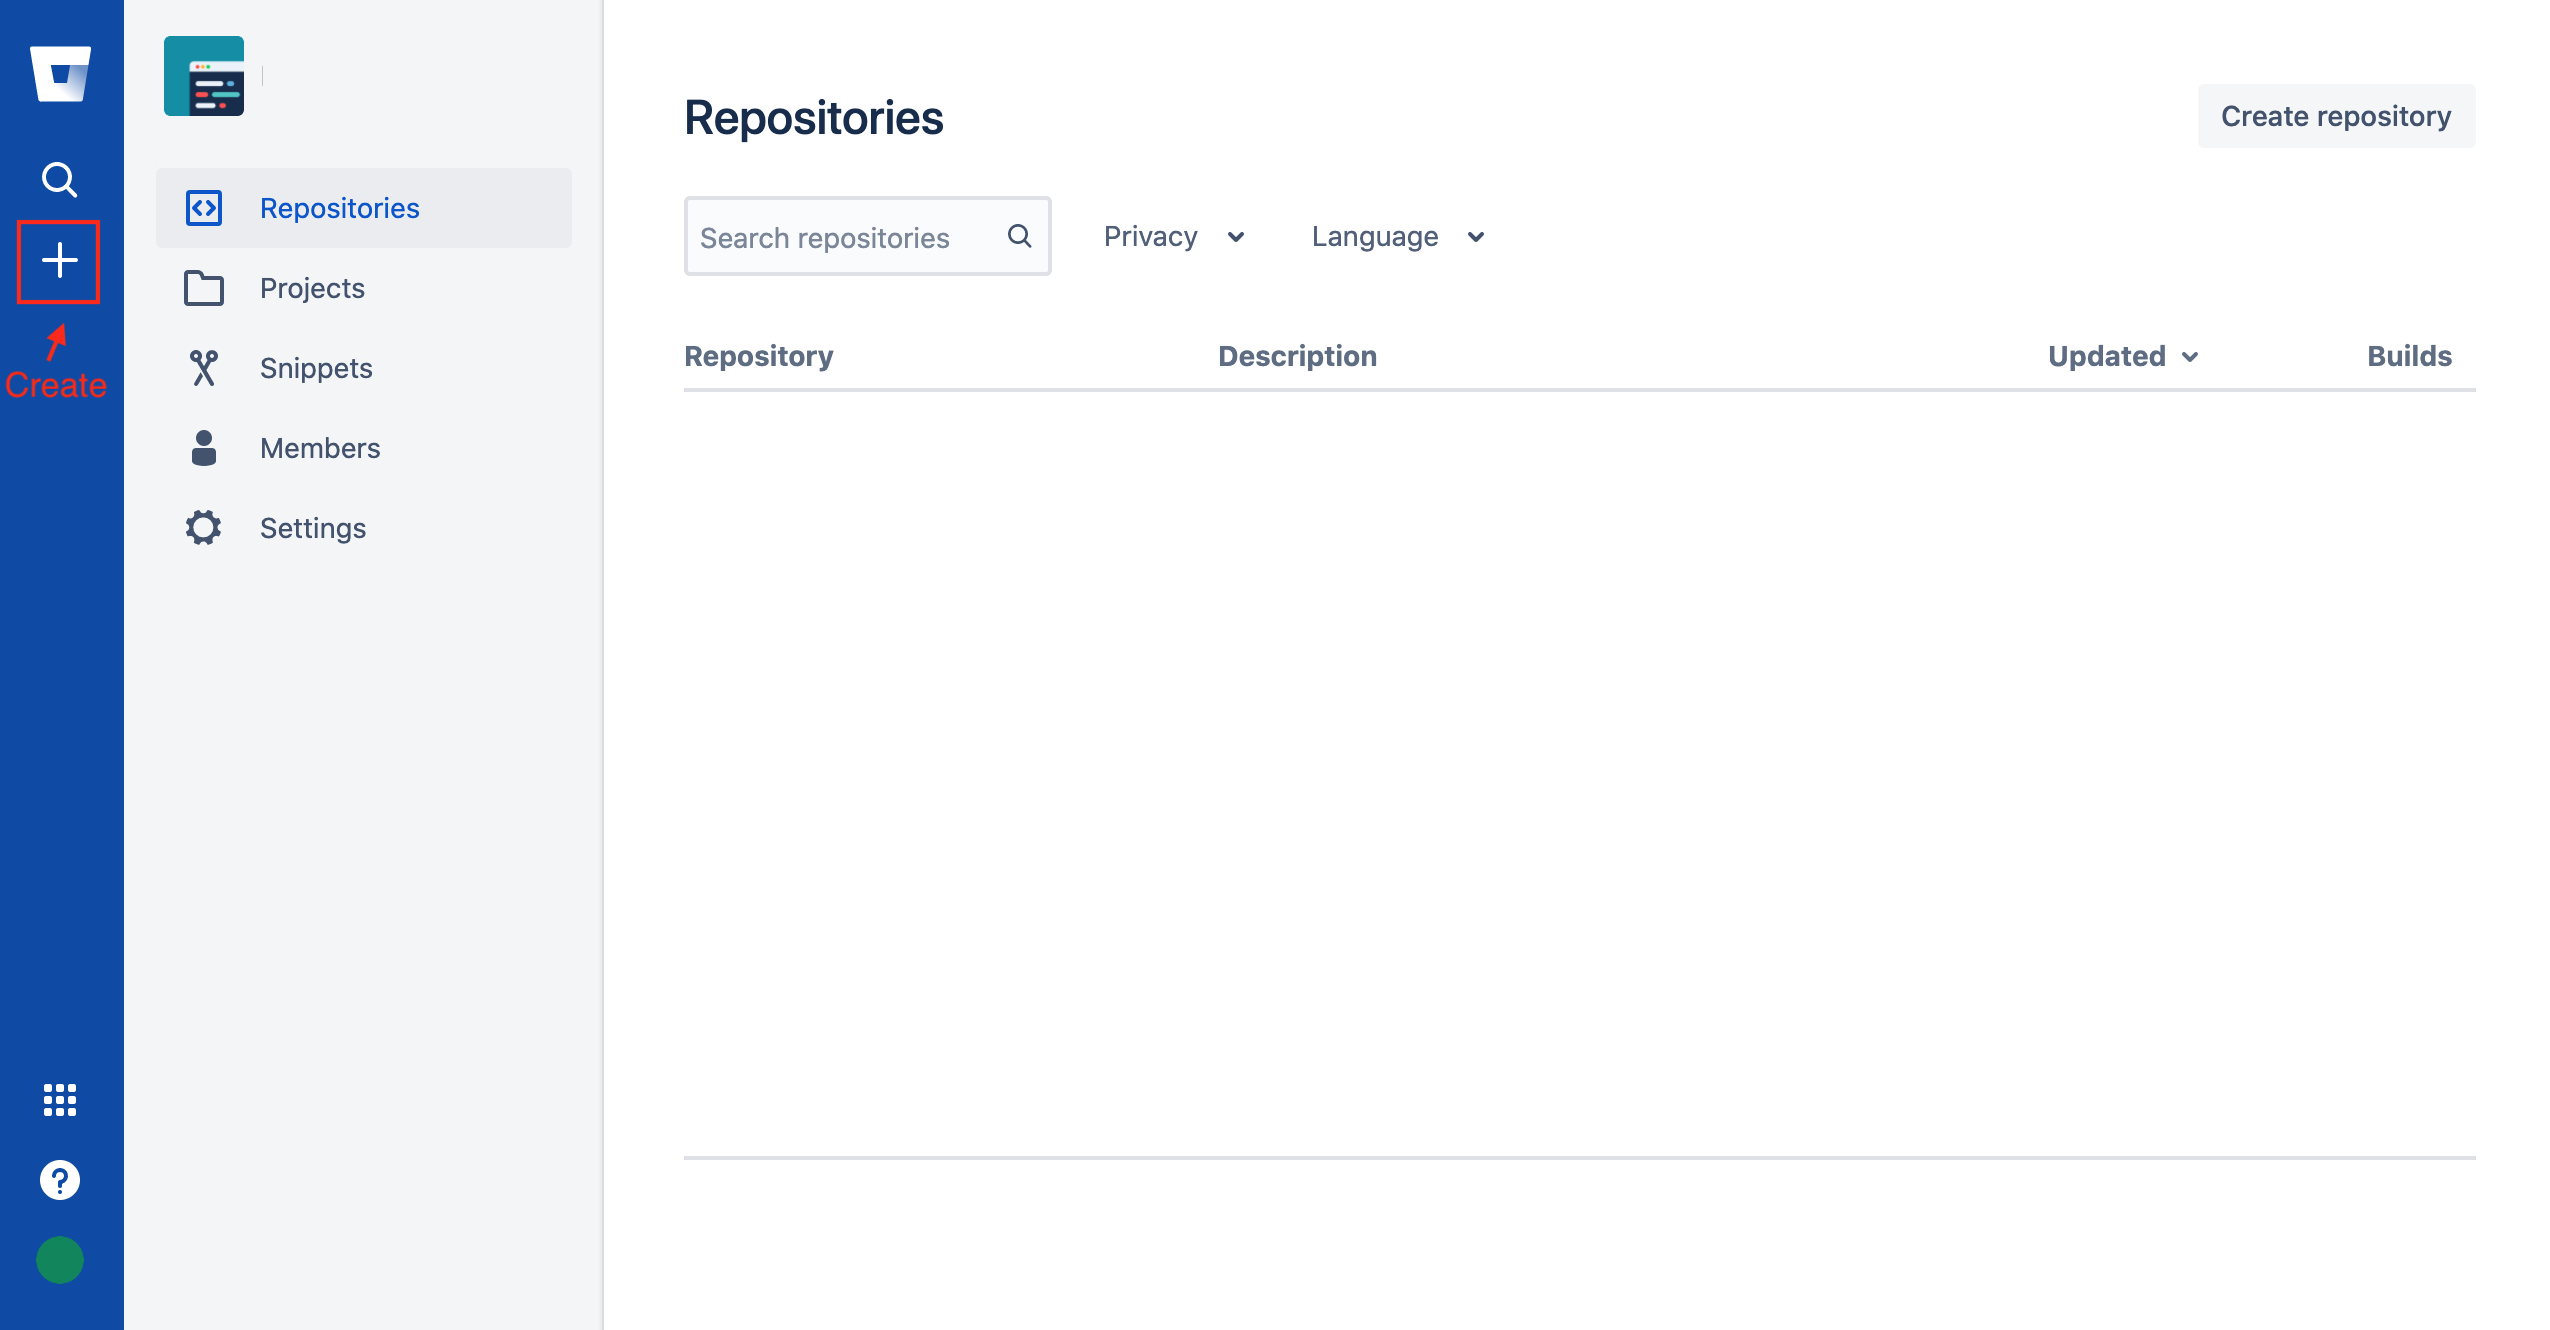
We start with sharing the changes we’ve made to our current project with the
world. Log in to Bitbucket, then click on the + icon in the left panel, and then Repository icon to create a new repository called planets:
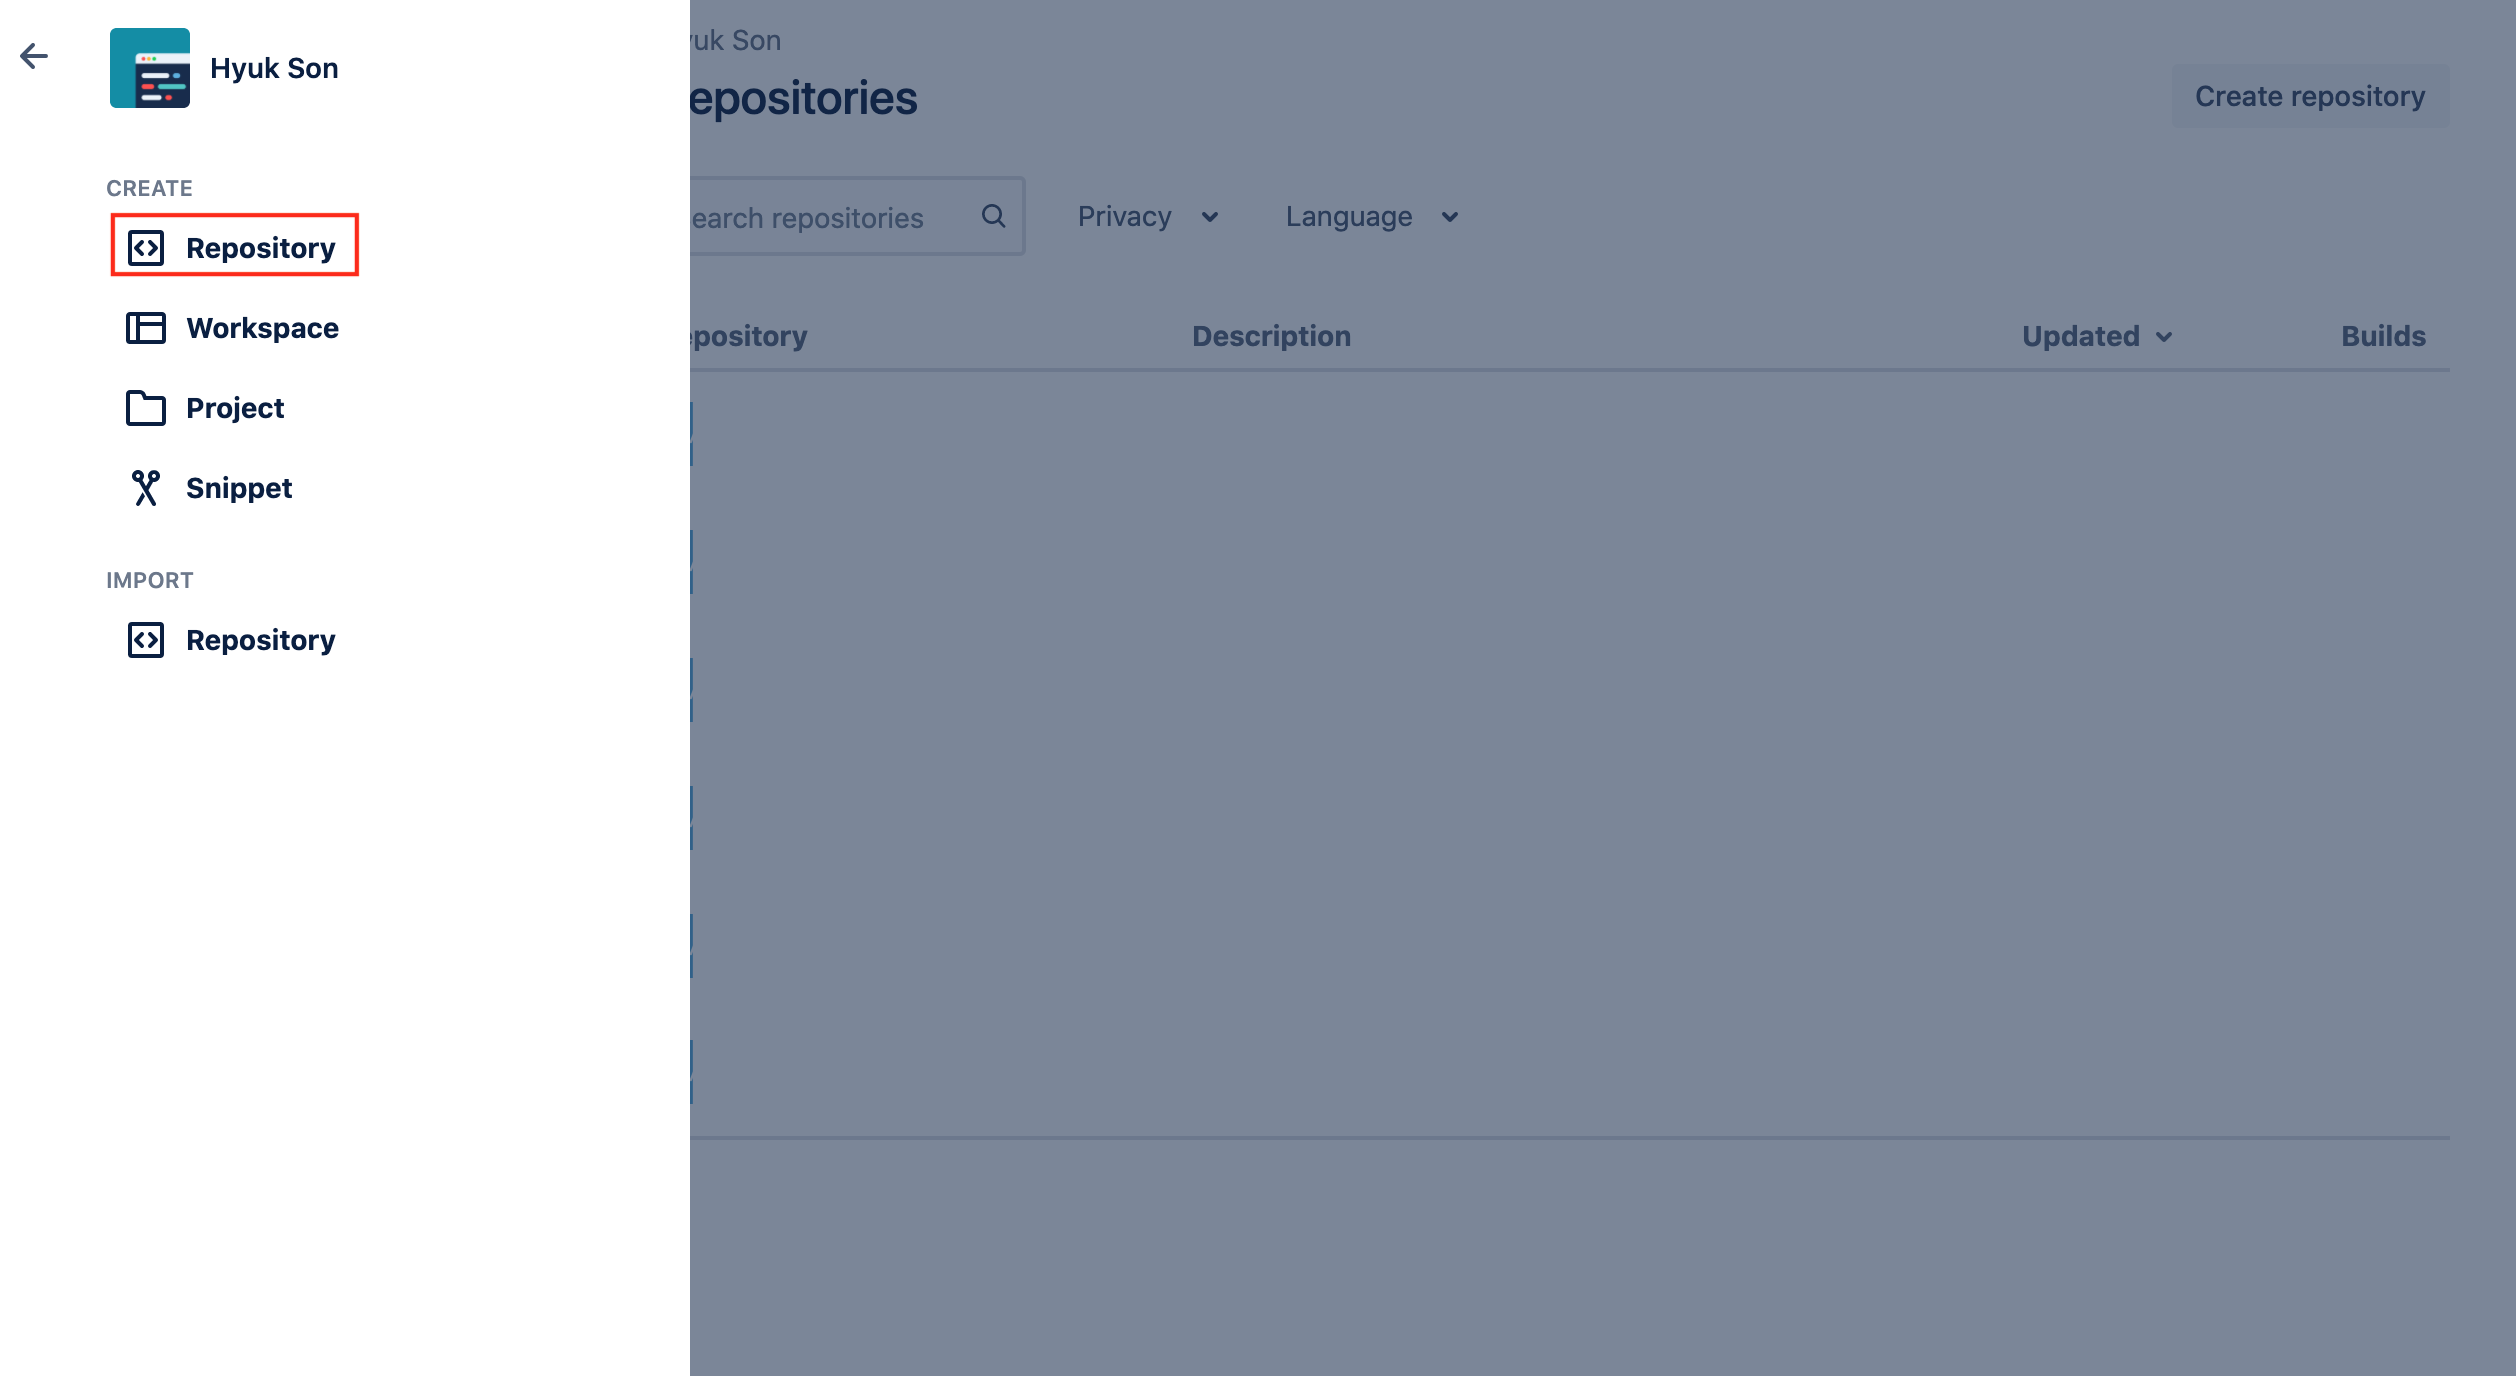
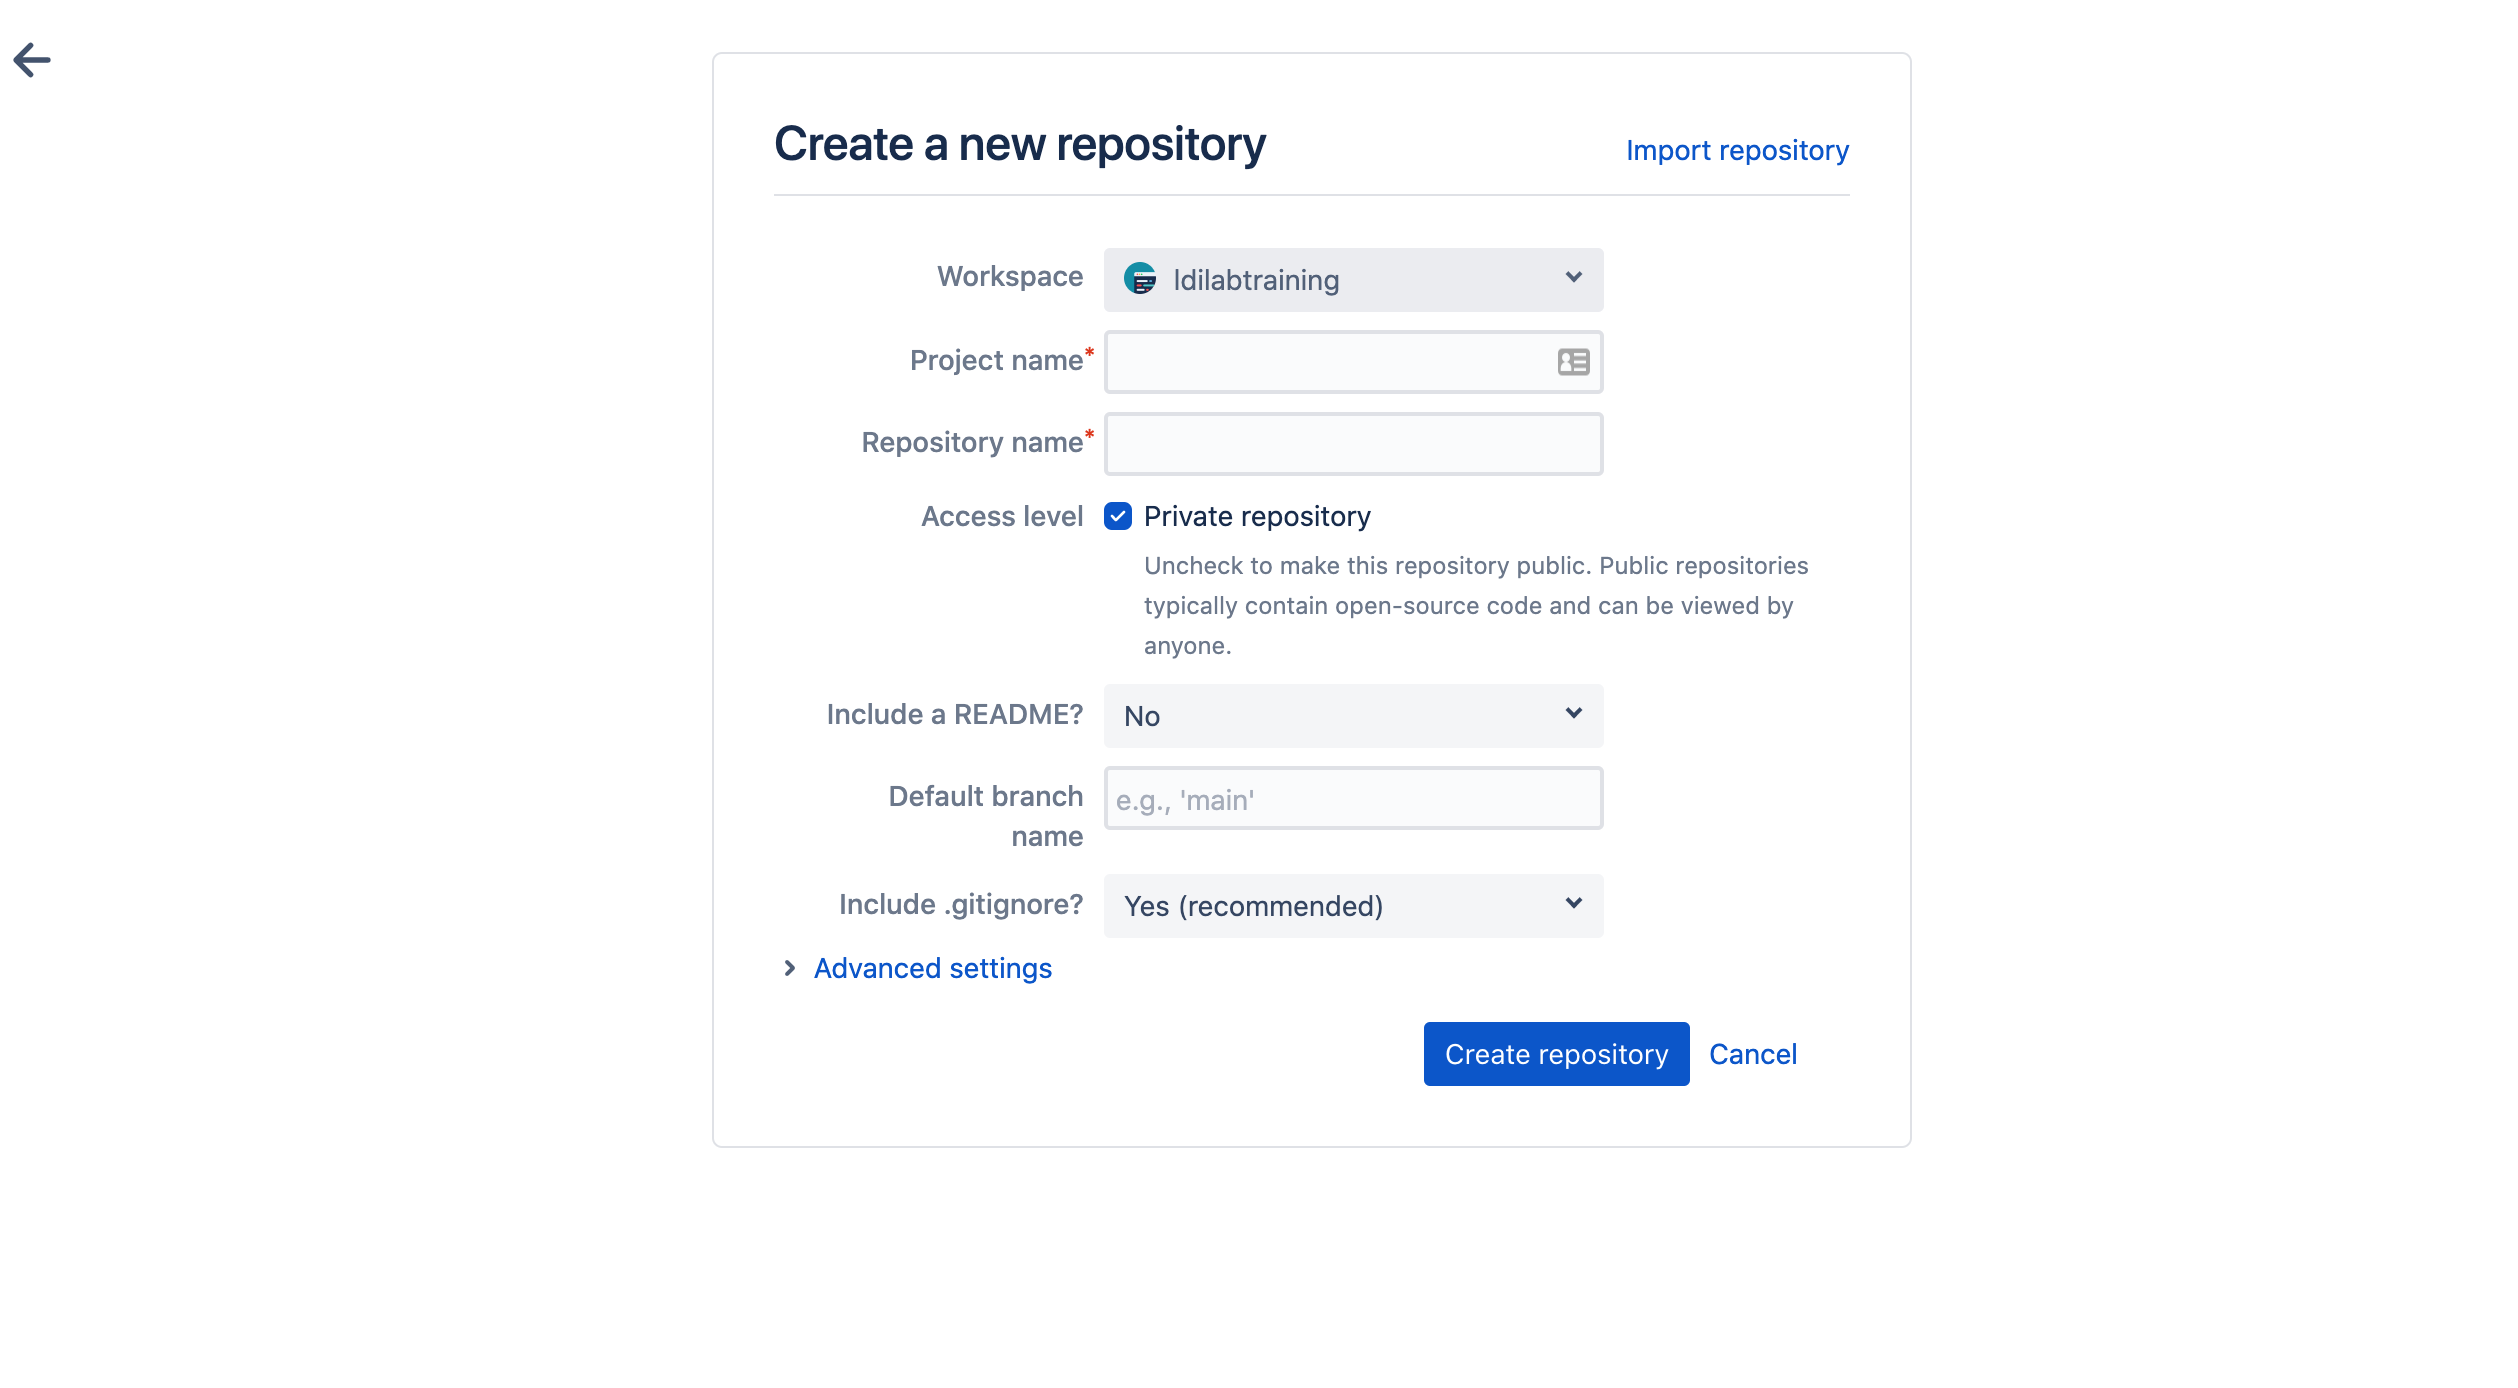
Name your repository “planets”, create a new project “training” and then click “Create Repository”.
Note: Since this repository will be connected to a local repository, it needs to be empty. Select “No” as options for both “Include a README?” and “Include .gitignore?” for now. See the “GitHub License and README files” exercise below for a full explanation of why the repository needs to be empty.
As soon as the repository is created, Bitbucket displays a page with a URL and some information on how to configure your local repository:
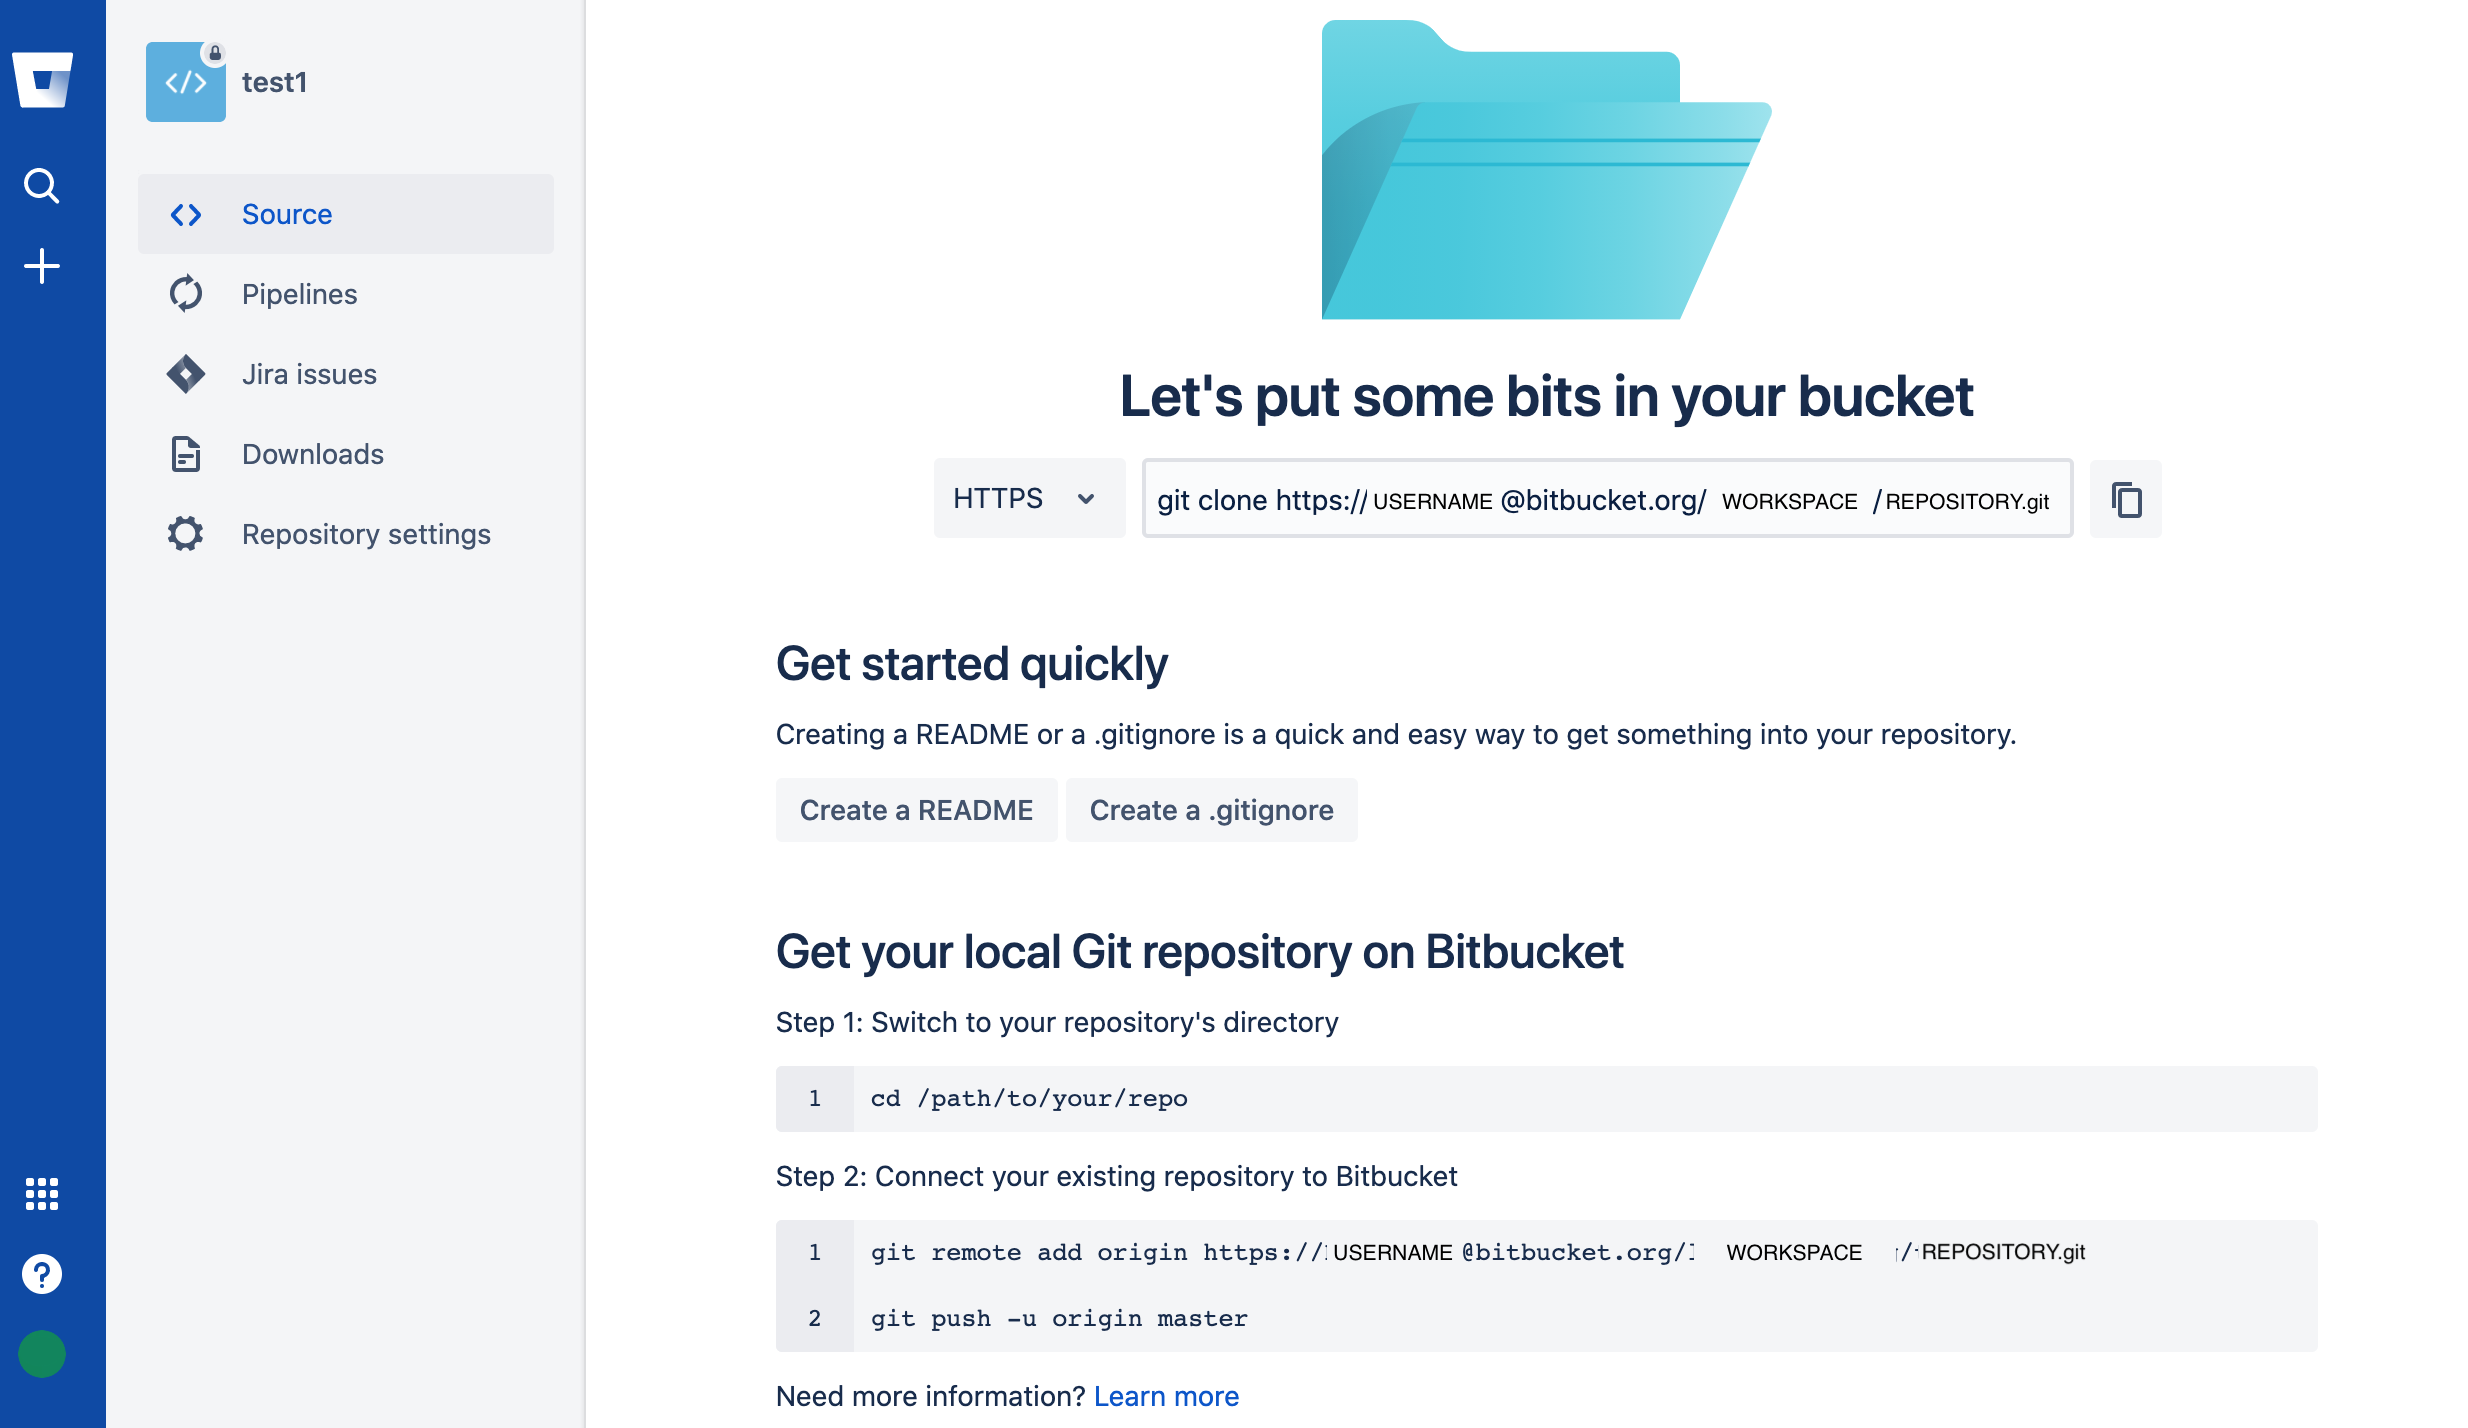
This effectively does the following on Bitbucket’s servers:
$ mkdir planets
$ cd planets
$ git init
If you remember back to the earlier lesson where we added and
committed our earlier work on mars.txt, we had a diagram of the local repository
which looked like this:

Now that we have two repositories, we need a diagram like this:

Note that our local repository still contains our earlier work on mars.txt, but the
remote repository on GitHub appears empty as it doesn’t contain any files yet.
The next step is to connect the two repositories. We do this by making the Bitbucket repository a remote for the local repository.
Copy that URL from the browser, go into the local planets repository, and run
this command:
$ git remote add origin https://Your_User_Name@bitbucket.org/WORKSPACE/planets.git
Make sure to use the URL for your repository.
origin is a local name used to refer to the remote repository. It could be called
anything, but origin is a convention that is often used by default in git
and GitHub, so it’s helpful to stick with this unless there’s a reason not to.
We can check that the command has worked by running git remote -v:
$ git remote -v
origin   https://github.com/vlad/planets.git (push)
origin   https://github.com/vlad/planets.git (fetch)
We’ll discuss remotes in more detail in the next episode, while talking about how they might be used for collaboration.
Once the remote is set up, this command will push the changes from our local repository to the repository on GitHub:
$ git push origin master
Enumerating objects: 16, done.
Counting objects: 100% (16/16), done.
Delta compression using up to 8 threads.
Compressing objects: 100% (11/11), done.
Writing objects: 100% (16/16), 1.45 KiB | 372.00 KiB/s, done.
Total 16 (delta 2), reused 0 (delta 0)
remote: Resolving deltas: 100% (2/2), done.
To https://github.com/vlad/planets.git
 * [new branch]      master -> master
Our local and remote repositories are now in this state:

The ‘-u’ Flag
You may see a
-uoption used withgit pushin some documentation. This option is synonymous with the--set-upstream-tooption for thegit branchcommand, and is used to associate the current branch with a remote branch so that thegit pullcommand can be used without any arguments. To do this, simply usegit push -u origin masteronce the remote has been set up.
We can pull changes from the remote repository to the local one as well:
$ git pull origin master
From https://github.com/vlad/planets
 * branch            master     -> FETCH_HEAD
Already up-to-date.
Pulling has no effect in this case because the two repositories are already synchronized. If someone else had pushed some changes to the repository on GitHub, though, this command would download them to our local repository.
Key Points
A local Git repository can be connected to one or more remote repositories.
Use the HTTPS protocol to connect to remote repositories until you have learned how to set up SSH.
git pushcopies changes from a local repository to a remote repository.
git pullcopies changes from a remote repository to a local repository.